Understanding the Basics of Post-Processing
Why Post-Processing is the Secret Sauce
Let’s imagine your raw photos as a chef’s freshest ingredients. They’re full of potential, but without the right preparation? Well, they’ve only scratched the surface of flavor. Post-processing is where your artistic instincts come alive—it’s the magic that transitions your vision into a stunning reality.
This isn’t just about bumping up brightness or slapping on a filter. No, it’s about crafting an experience: highlighting the mood, drawing focus to the details that matter, and enhancing what’s already beautiful in your work. Whether it’s fine-tuning the shadows, perfecting those brilliant skin tones, or making those landscapes pop, post-processing skills separate amateurs from pros.
What Every Beginner Should Know First
Before diving into tools like Lightroom or Photoshop, get familiar with the essentials:
- White balance: The unsung hero of color correction—it can shift your image from dull to divine.
- Exposure: Who doesn’t want their shots to feel perfectly lit? Master this and watch your photos sing.
- Sharpness: A crisp subject against a dreamy background? Yes, please!
Think of these basics as your foundation. Without them, every other touch feels like putting glitter on a poorly baked cake. Start here, and you’ll be unstoppable.
Common Mistakes in Post-Processing
Overdoing It: When “More” Becomes Too Much
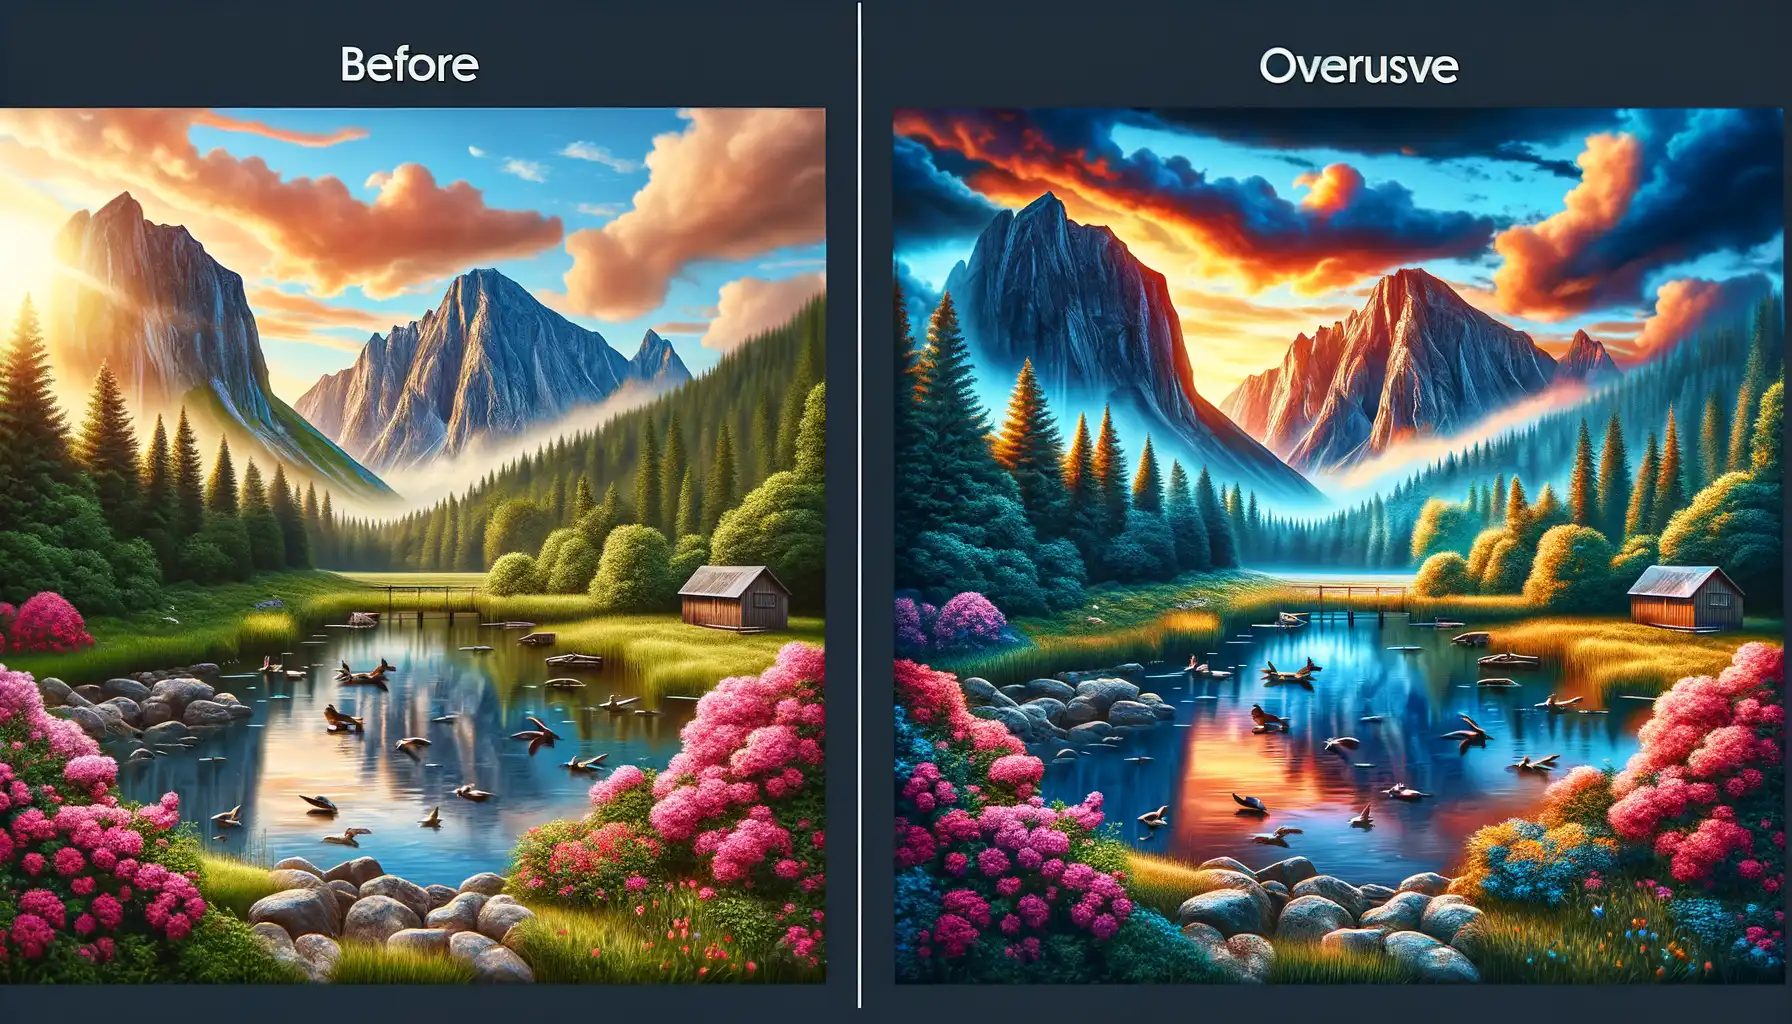
Have you ever found yourself chasing perfection, dragging every slider to the extreme in your editing software? It’s a slippery slope, and before you know it, BAM—your photo looks like an overcooked HDR mess rather than a masterpiece. One of the most common mistakes in post-processing is over-editing. Think neon skies, plastic-smooth skin, or shadows so crushed, they look like a black void.
Here’s the thing: subtlety often wins the race. Whether it’s saturation, contrast, or sharpening, always take a step back and ask, “Am I enhancing the story, or am I suffocating it?” Trust me, less is often more when it comes to retaining authenticity in your images.
- Saturation: Those vibrant colors may catch the eye at first but can quickly feel cartoonish.
- Skin Retouching: Airbrushing to oblivion erases humanity; embrace natural textures.
- Clarity: Overusing this tool can make your photo look gritty and unnatural.
Ignoring Consistency Across Your Edits
Let’s talk about continuity. You’ve probably seen it before—a photo series where one image screams warm golden tones, and another feels icy cold. It’s a jarring experience for the viewer, like walking into a room with clashing wallpapers.
Why does this happen? Often, it’s due to a lack of attention to color grading consistency. For instance, you might get too attached to presets that don’t align well across your shots. Or maybe you tweak white balance individually without stepping back to assess the whole series. Whatever the case, your work needs harmony. Aim to tell a seamless story, not a chaotic scrapbook.
Techniques for Avoiding Post-Processing Errors

Mastering Workflow for Flawless Results
When post-processing, think about it like assembling a puzzle—start with the edges first. A solid workflow is your safety net. One of the biggest culprits behind errors? Rushing or skipping steps. Trust me, even seasoned creators fall victim to this trap. To build a seamless process:
- Organize your files: Keep everything labeled and stored where you can find it without a scavenger hunt.
- Work non-destructively: Always duplicate layers in Photoshop or use RAW files to preserve originals.
- Be mindful of your editing order: Sharpening before noise reduction can turn your image into a pixel warzone!
When you’re deliberate about the path you follow, you not only avoid errors—you save precious time too.
Tuning Your Visual Instincts
Sometimes, it’s not the software; it’s our eyes tricking us. Have you ever stared at an edit so long that colors start looking “off”? Give yourself breaks! Come back with fresh eyes (and maybe a cup of tea). Better yet, check your work under multiple lighting conditions. That bold saturation you loved on-screen might scream “neon chaos” when printed. Oh, and always scrutinize those edges! Missed spots around cutouts or halos from over-sharpening? Not a good look.
Refining your instincts is as much about stepping back as it is zooming in. Balance technical precision with artistic intuition, and you’ll spot errors before they become regrets.
Tools and Software Best Practices

Choosing the Right Tool for the Job
The world of post-processing software is vast and dazzling, but here’s the thing: not every tool will be your magic wand. You wouldn’t use a chainsaw to prune a bonsai, right? The same logic applies here. Whether you’re editing photos, videos, or sound, you need to choose tools that match your goals. For example, while Adobe Photoshop excels in intricate retouching, it might feel like overkill for simple color adjustments better suited to tools like Lightroom or even GIMP.
Pro tip: Spend time experimenting with trial versions of software. Feel their pace, their quirks, and find the one that feels like an extension of your creativity.
Setting Up for Success with Software
Your software, no matter how advanced, can’t work wonders if it’s poorly set up. Here are a few golden nuggets to keep in mind:
- Calibrate your equipment: A top-tier software paired with an uncalibrated monitor? Recipe for disaster. Colors might look glorious on your screen but dull elsewhere.
- Keep your tools updated: Outdated versions can be buggy and miss out on lifesaving features. Updates aren’t just a nuisance—they’re your software’s way of staying sharp.
- Keyboard shortcuts are your best friends: Learn them. They don’t just save time; they make editing feel like playing a piano instead of fumbling with a typewriter.
Conclusion and Final Tips

Dive Into Details Without Losing the Big Picture
When it comes to post-processing, it’s easy to get lost in the weeds. One moment, you’re fine-tuning the exposure slider; the next, you’ve spent hours wrestling with colors and your photo looks like a neon fever dream. Sound familiar? Don’t worry—you’re not alone. The trick is knowing where to stop. Ask yourself: does this edit enhance the story I’m trying to tell? If the answer’s “not really,” it might be time to hit undo.
Here’s a pro-tip: take breaks. What looks amazing at midnight can feel overcooked when viewed in daylight. Step away, let your eyes rest, and return with fresh perspective. You’d be surprised how much clarity a little distance provides.
Keep Snake Oil Software at Bay
Not every tool out there is your friend. Sure, that AI-powered filter promising one-click perfection sounds tempting, but does it deliver—or just dilute your personal style? Before diving into new tools, stick to the essentials. The golden trio of editing software—Adobe Lightroom, Photoshop, and Affinity Photo—offers more than enough power to bring your vision to life.
If you’re overwhelmed by options, start small. Simplify your workflow by focusing on what actually improves your image:
- Clean up distractions: Use spot-removal tools with care, not aggression.
- Subtle enhancements: Adjust shadows, highlights, and saturation gradually.
Remember, the goal isn’t perfection—it’s balance!